Apples Again!
If you enjoyed reading October’s article on the history and production of craft hard cider, you’ll hopefully be even more pumped to read this month’s article on actually creating a batch of hard cider; which is exactly what I did a few weeks ago with my home-brewer friend Steve Bishop.We spent an entire Sunday from start to finish creating the perfect homemade beverage for autumn consumption.
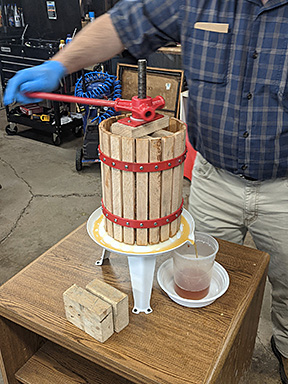
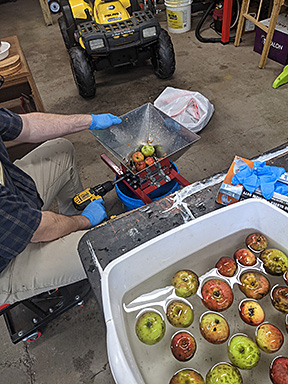 Steve had picked several 5 gallon buckets of apples from his family property for us to use, and truly just about any variety of apple will do. The first step in creating hard cider is obtaining juice from the apple. We began by rinsing the apples, and then put them through a stainless-steel grinder that Steve had rigged up to power with a handheld drill in order to crush them up enough for us to press. The crushed apples – flesh, skin, seeds, cores and all – were then placed into a cheesecloth that sat in a small barrel-shaped wooden apple press. The press itself sat on a slightly tilted round metal plate with grooved edges meant to collect the juice from the apples where it gently meanders to the spout located on one side of the plate, where we had a container ready to gather the apple juice. In order to obtain the juice, after the apple bits are placed in the cheesecloth, a wooden top is placed over along with a metal component with a handle and by hand-cranking, the wood presses down evenly over the apples and the juice is expressed as pressure is applied through the force of hand-cranking and the apples being compressed together. After no further pressure can be applied, the hand-crank is turned in the opposite direction, loosening everything up. What’s left of the compressed apples are removed from the cheesecloth and thrown away (or if you have a farm and can feed them to pigs or the like, they would go to good use!) and we’d start the whole process over again until all the apples were pressed. Also, during this whole process, we wore nitrile gloves because it gets quite sticky!
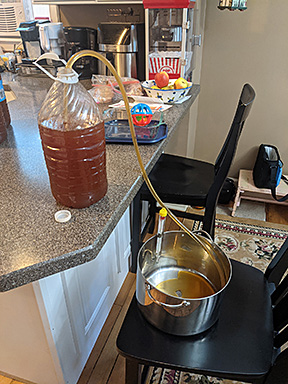
 All the juice expressed from the apples, a light mahogany brown color, was collected into 5-gallon plastic containers that had been sanitized (Star San is popular in the brewing industry) prior to starting our pressing, bringing us to the next step involved in making hard cider: pasteurization. This involves bringing the cider to a specific heat level in order to kill bacteria and other microscopic organisms in the juice itself. To do this, we used a gas kitchen stovetop and placed a large pot over a burner with a candy thermometer perched on the lip of the pot so that the tip would be directly immersed in the apple juice. When the juice is in the plastic containers, as it sits, sediment from the juice settles to the bottom, and you want to filter out as much sediment as possible when brewing. Therefore, in order to get the apple juice from the plastic containers and into the pot, and avoid the sediment, we had to siphon the juice using a plastic tube (also sanitized). Once the juice is in the pot and on the stove, the heat is turned on – but the goal is not to get to a rolling boil, so the heat has to be controlled. 160-185 degrees Fahrenheit is the optimal temperature range for it to reach. Any foam on the top that accumulates is skimmed off during the heating process, and once the juice has reached its optimal temp, the heat is turned off, the juice is left to cool slightly, and it is siphoned once more from the pot back into a cleaned and sanitized container (we reused the 5-gallon plastic containers, but glass can also be used) again, with the goal of leaving out any sediment at the bottom of the pot that may have settled during the pasteurization process and is allowed to cool. At this stage, you officially have cider! You can pour some straight from the pot and into a mug and sip on hot apple cider, which is what we did for a taste and to get warm on that cool, rainy, Sunday afternoon. The flavor was quite lovely! You can also keep the pasteurized cider in the fridge and just continue to drink it cold. Or, you can begin the fermenting process and create hard cider – which is what we did.
 Our third step is fermentation – the pasteurized cider is then placed into a sanitized fermentation bucket, or a glass carboy (a 5-gallon glass jug) with a fitted airlock. (An airlock is a one way valve, letting gas escape but not letting any outside air in.) If the cider is not cool at this point, it should be allowed to cool to below 90 degrees. Anything above this temp and any yeast added will be killed, so it’s a good rule of thumb to let the cider cool to room temperature for safety’s sake. There are many different varieties of yeast to utilize in order to make hard cider, but many cider-brewers use champagne yeasts. Some brewers opt to add more sugar to the apple cider for the yeast to eat before sealing the bucket with a lid and airlock. Once the concoction is sealed, the bucket should be placed in a temperature-controlled room between 65-75 degrees where it will ferment for the next two weeks or so. In this case, it was Steve’s basement. Over the next few days, the airlock will start to bubble, this is a visual representation of the carbon dioxide produced by the yeast as it eats the sugars in the cider – a byproduct – while the cider is turned into an alcoholic beverage. The fermented cider is then left to sit a bit longer so that the yeast settles to the bottom. At the end of the fermentation process, many folks will siphon the fermented cider out of the bucket (or original carboy) and into a (new) glass carboy to further separate any sediment and remaining yeast that may contribute to any “cloudiness,” and allow this to sit for another week or so. At this stage, the fermented cider is more like an apple wine – no bubbles, minimal sweetness – I tasted it, so I know!
The fourth and final step in the process is to bottle your fermented cider – because it takes weeks to ferment, Steve had a glass carboy that he had previously fermented and ready to go. To increase the sweetness of the hard cider, Steve added erythritol sweetener, a sugar alternative, to the bottom of a sanitized bucket. You don’t want to add sugar to the cider to specifically increase sweetness, because any yeast left will eat it, therefore you want a sweetener that the yeast will leave be. However, you DO still want some sugar (called priming sugar) added to the cider before bottling, so that carbon dioxide gas can be created and therefore give the hard cider it’s carbonation. How much sugar to use is a very delicate process. Too little and the cider will be mostly flat, too much and the bottles will explode. There are many calculators online to give an exact calculation, but essentially for every gallon of cider, you add 1 ounce of sugar to a half-to-full cup of water, bring it to a boil, stir it to completely disintegrate the sugar and let it cool before adding it to the bucket.
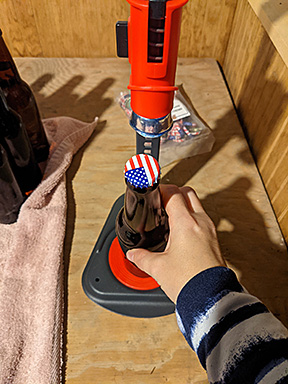
We added the erythritol and the sugar mixture to the bucket, stirred it into a slurry, and then we siphoned (yes, there is A LOT of siphoning when you make hard cider!) the liquid out of the glass carboy and into the bucket, stirring the concoction together until fully dissolved. Once dissolved, we hoisted the bucket onto a table and readied our bottles. Bottles do need to be sanitized prior to use. There are many contraptions to make this process easier, all one needs to do is visit a home-brewing store or check out Amazon or other websites online to purchase. We lined up all of our bottles, and using more siphon tubing attached to a spring-tip bottle filler/wand, I inserted the wand into the bottle, gently pressed the tip on the bottom of the bottle and it automatically started filling the bottle, stopping approximately two inches from the top of the bottle. Continuing on until all the bottles were filled (5 gallons = 54 bottles!), the last step was capping each of the bottles to be air-tight. While there are several models, Steve’s choice is a bench bottle capping machine that only uses one hand to operate and cuts down on the amount of effort needed to complete. Easy as (apple) pie!
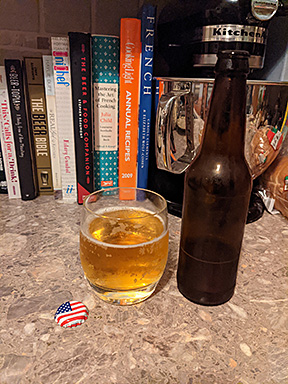 I took 6 bottles home with me that evening and allowed them to sit for at least 2 weeks at room temperature while the remaining yeast ate the controlled amount of sugar we added in order to create carbonation. 2 weeks and 3 days later, I cracked open my first homemade cider – Bubbly, fresh, crisp and just slightly sweet! So good!
One final thing to note is, how do we test for the ABV? Or how do I know how much alcohol content is in my hard cider? We do this using a hydrometer. The hydrometer measures the specific gravity, or sugar content, of cider. We complete this measurement before fermentation and then also measure after fermentation, using both sets of data to calculate the estimated ABV or alcohol by volume of the cider that is consumed once you pop open the cap to drink. Again, utilizing an online calculator comes in clutch. It helps to log all these readings and take notes on all your batches to keep track using a small notebook. Steve does this and it comes in very handy, especially when I come along asking lots of questions!
All in all, my Sunday spent making hard cider was fun, informative and insightful. I’m always up for a new learning experience and Steve was a great teacher – so a special shout out to him! Thank you! Hopefully this inspires all of you to try something new too!
Cheers!


